This isn’t something I was originally planning to write about but after all the recent posts on fixing up the FM Towns I thought I may as well finish the story off. I’ve found so little information when Googling, I’ll try to spare someone else the trial and error I’ve gone through.
At any rate, shortly after finishing a long awaited playthrough of Wing Commander, I decided it was about time to sort out the dead CMOS battery on my FM Towns II UR. I had no idea where the battery was located or how to take the machine apart which is where this guide comes in. Most of these photos were more for my reference than anything else and not with this purpose in mind so bear with the quality.
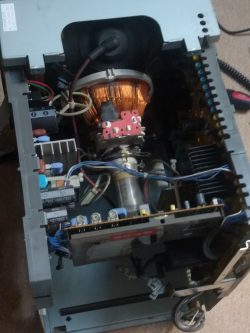
Taking the back of the case off is easy enough. Just undo the 4 screws + remove the memory slot flap and the back of the case will slide straight off. This just presents you with a second inner case of steel panels, the top of which needs to be removed by undoing the many, many screws holding it in place.
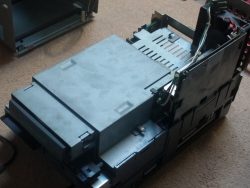
That will expose the built in monitor and the various boards surrounding it. Hopefully this goes without saying but CRT screens act like giant capacitors and are more than capable of giving out lethal electric shocks. You either want to discharge the tube or be extremely careful not to touch it. The good news is that you don’t need to go near this part of the system much so the latter should be fine. The computer part of the unit is on a separate caddy that can be slid out of the back once unscrewed.
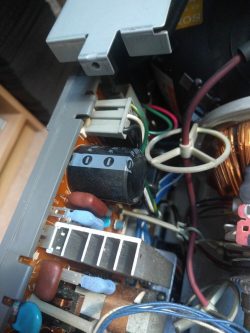
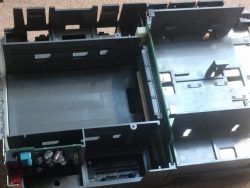
Before sliding this out, you will need to unplug the monitor cable at the front left, the speaker cable at the front right, a connector cable at the back right and another at the top left of the case (the grey three pin plug in the photo above). It should be obvious which cables once you start sliding the unit out.
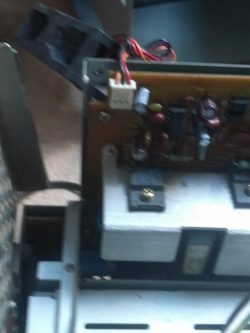
Having got this far, you need to remove the fan at the back of the case so that you can then remove the board it is attached to. You can unscrew the fan through the metal grill. There is nothing attached to the circuit board at the bottom, it just needs unplugging, unscrewing and lifting out.
Since I had no idea where the CMOS battery was, I continued stripping parts after this. A lot of these clip into place on the plastic frame so you simply have to pry the plastic clips open to release. It’s quite a neat design but doesn’t exactly give easy access to the motherboard since it’s at the bottom.
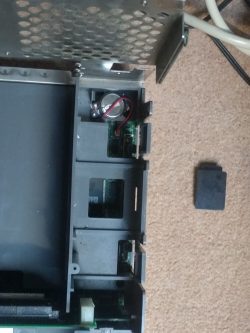
I was expecting the CMOS battery to be attached to the motherboard and that I would need to strip everything right down to that level. As it happens, I could have stopped earlier. Just below where the fan was is a little space with a black plastic tab over the top. The CMOS battery is hiding just underneath the tab. It’s attached to the motherboard via a plug and short wires so you can easily remove it.
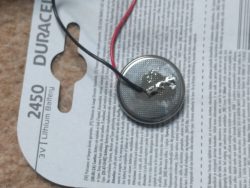
The metal plates at the ends of the wires are firmly attached to the old battery. I pried these off as far as they would go, snipped off the remainder and soldered what was left to a new battery. Soldering to batteries isn’t exactly the best of ideas but it does the job. It’s a CR2450 battery you need if you want an exact replacement. I wrapped this up in tape and started the rebuild.
Once I had the machine back in one piece, I endured a lot more messing around before I was sure my fix had worked. I’ve been using Towns OS to set up my hard drive each time I started the PC. I still found the settings weren’t being saved if I powered off. The clock on the other hand was now keeping time so I knew my battery was working. I had the idea that maybe there was a second battery in the unit for a while but it turns out that all I needed was to use a DOS boot disk, with the setup2 program (as described in a previous post) to set up the hard disk. This then saved the CMOS settings correctly.
Installing Towns OS is nice and easy. There is a utils folder on the towns CD with an install program (it’s the icon with HD and an arrow). I did find out that this wiped my hard disk after I’d done it. Not a big deal but I won’t be importing my Wing Commander pilot into Secret Missions as a result. I had been planning on doing a video showing the last mission but I’ll do the last mission of Secret Missions II instead (when I make it that far).

Bit off topic but can you post more retro PC Gamer Top 100s from the 1990s?
Very off topic I would say. Too 100 lists are always fun though. I’ll see if I can dig another one up.
Great. Time to compare ’96 to ’97!