Day 76

I start out today with having replayed the game with my hacked character more or less to exactly where I was in the first place before the inventory bug struck. My first task is to take the picture of Tom back to Judy on Level 5.

She cries a single tear which drops in the lava to make the final bit of my 3 part key.

Next I take Garamons bones back to his grave on the same level. As soon as I do so he is able to talk to me like any other character. We need to create a gate to send this demon back to its original world.

After a quick quiz we establish that the way to do this is to throw all 8 talismans into the center of the volcano right in the middle of level 8. To get into this room I need the key of infinity which I’ve already got.

The center of Level 8 is a pretty dangerous place with lava, fire elementals and golems all over.  I kill off everything in sight before opening the door with the 3 part key.

Inside is the slasher of veils still bound to the spot. I throw all my talismans at him one at a time…

Garamon creates his gate but I’m sucked inside.

I end up in a very strange world. The clue to the way out goes right back to that orb on level one where I take the green path in my vision. The odds on anyone remembering that at this point are slim but there is only a choice of two paths anyway.


The path twists and turns all over the place and I can’t afford to fall off as there is just void below me. There are all sorts of strange creatures floating about which I just ignore – they are just there for decoration as such. The slasher of veils chases me the whole way with my HP going down all the time.

Finally with my HP running out I see a green moongate. I run through and the end cutscene kicks in.


Britannia is saved once again and the abyss is cleared out to no doubt reappear in Ultima 7 in a new form. I’ll be interested to see if any of the characters in this are in Destard in Ultima 7 when I get that far.

I had been looking forward to replaying this game and while I enjoyed most of it having to replay 95% of it because of the inventory bug has left me pretty much glad to have it out of the way. It must have taken all of 10-15 mins to finish up today – I could hardly have been any nearer the end when I had to restart. It goes to show how a great game can be ruined by bugs or in this case a single bug.

Having said that, I do like the ending of this game. The ethereal void section is quite tense as you have to dash full at full speed trying not to fall off the path while constantly losing HP. Added to the strange world and creatures it makes for an exciting end and certainly impressed me back in the early 90’s when I played it first. It was also about the only bit of the game that ran smoothly on my 386SX as I remember. The end cutscene is perhaps a little briefer than I would have liked with no new music or anything but it wraps things up nicely enough.

Next: Wing Commander 2 – Special Operations 2

Day 75

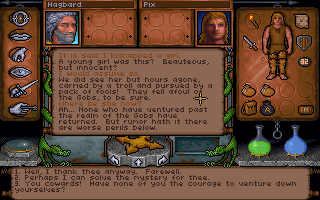
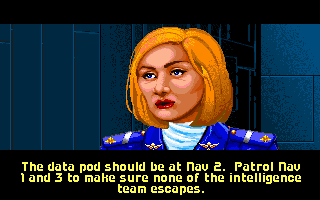
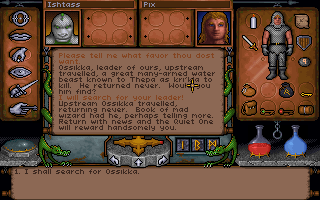
One of the grey lizardmen asks me to find out what happened to his friend Ossika who travelled upstream.

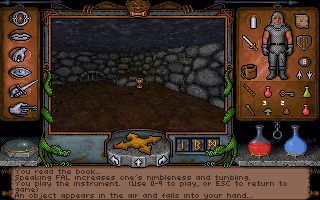
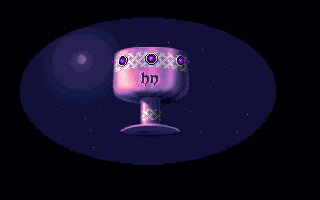
I head off in the wrong direction but while I’m here pick up another talisman (the cup of wonder). To get this I have to play a certain tune on a flute in this location and it pops up out of thin air. I’m way ahead of myself here but since I know the tune I may as well.

I find Ossikas remains about 10 seconds swim out of the lizardmans area.

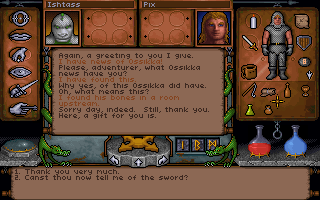
I return with proof and get a minor reward for completing the quest.

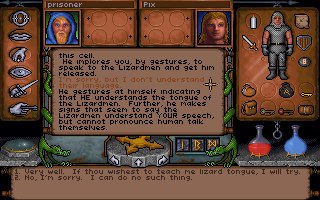
There is a trapped mute seer in with the lizardmen. He can understand the red and green lizardmen who don’t speak English but this doesn’t help me and I can learn the language through him in order to try to talk them into letting him go.

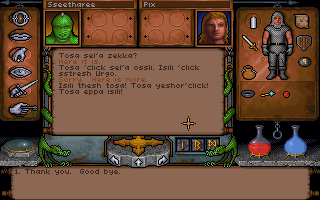
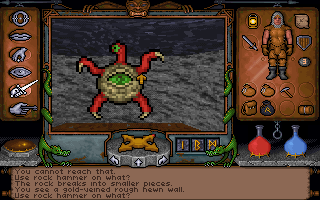
The lizardmen want food in exchange. Using a fishing pole I fish in one of the rivers to get a load of fish.

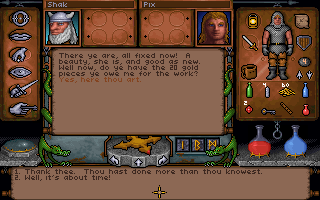
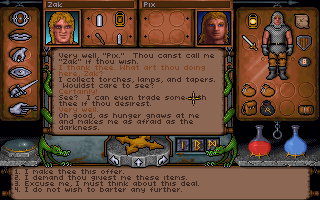
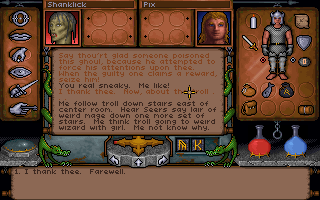
Murgo is let go and skips away without so much as giving me a useful item.

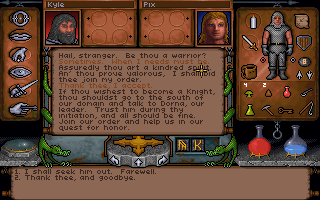
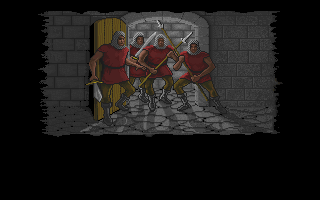
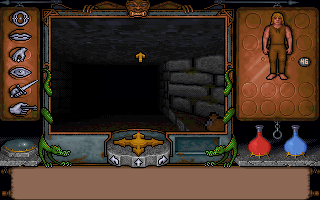
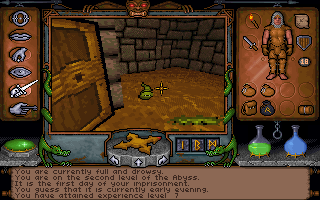
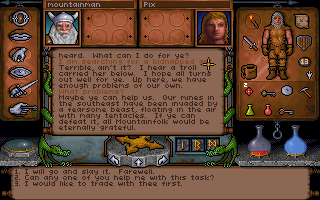
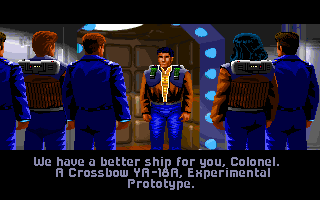
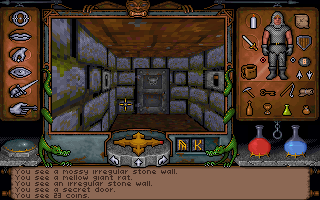
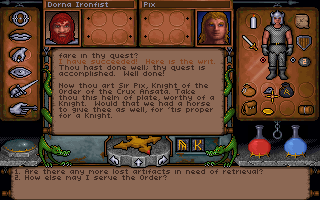
There isn’t much else important on Level 3 so I head for Level 4. This is home to a group of fighters originally from Jhelom. I’m sent to see their leader to join the order.

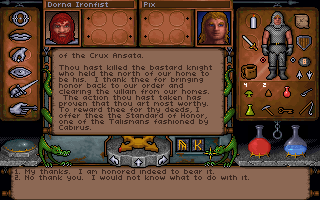
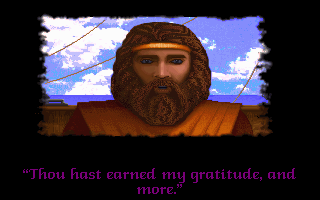
As soon as I speak to the leader however he rewards me for killing the Chaos Knight with The Standard of Honor (another talisman).

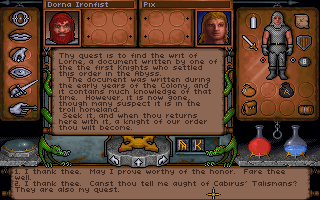
Speaking to him again, I get a brief ritual where he asks me to drink some poison – as long as I do so (its only water) then I’m made a squire. My first quest is to retrieve the writ of Lorne.

Before I look for the writ, I talk to some of the other knights. One of them is a gem cutter so I give him the one I picked up from the dwarves. He tells me where to find the ring of humility in return.

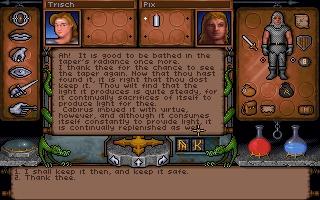
Another knight tells me about the taper being stolen. Since I already have it they just confirm what it is.

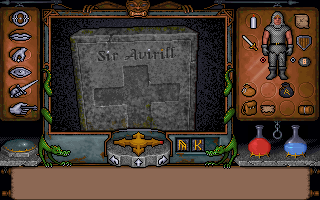
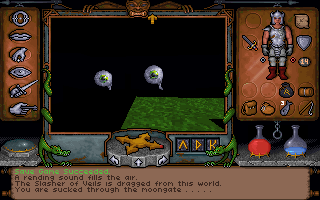
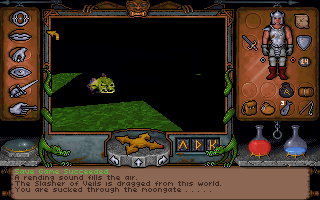
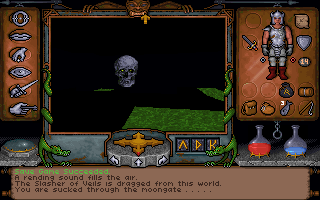
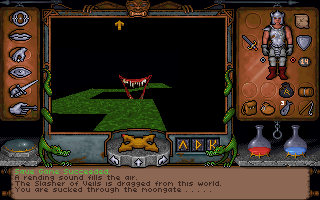
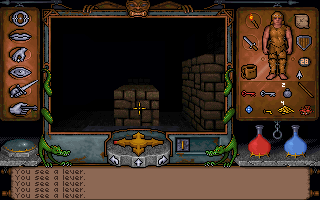
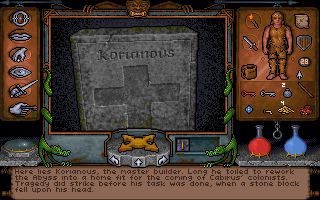
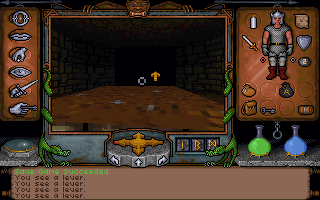
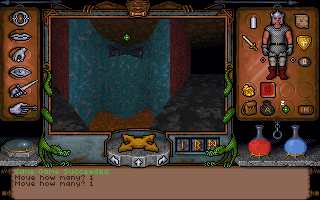
One of the quests I’ve not received yet involves flicking two levers in the right sequence. The two graves above give the clue to the sequence in the colored dots over the i’s.

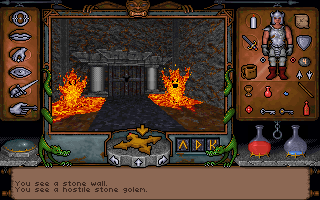
Another knight tells me about the shield of justice on the next floor down. Its guarded by a golem who I have to defeat to win the shield.

I’m ahead of myself again but I head off to get a gold plate which will be the next quest from the knights (after the writ). I flick the levers in the order from the graves.

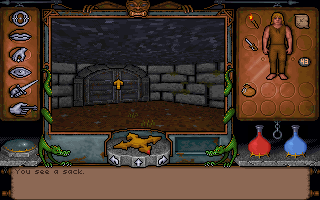
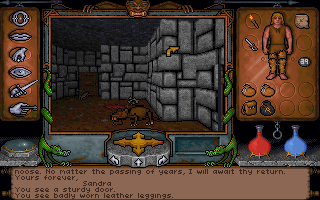
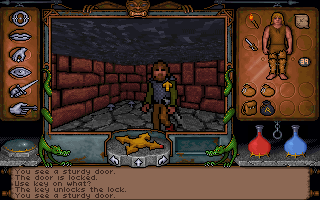
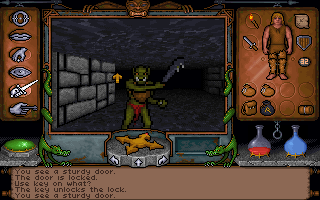
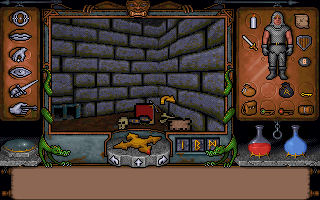
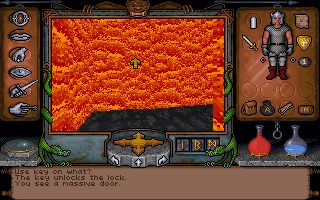
The writ is in a shrine in with the trolls on this level. To get the door open I have to give the guard a ruby.

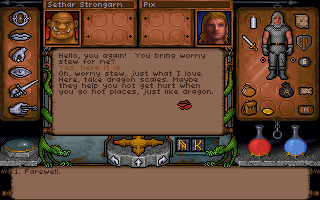
Another of the trolls takes the rotworm stew, I’ve been carrying around for ages and in return gives me some dragon scales. I can get these made into boots later so I can walk on lava without taking damage.

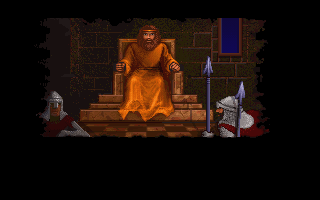
Dorna takes the writ of Lorne and makes me a knight. I get a new helmet for my trouble.

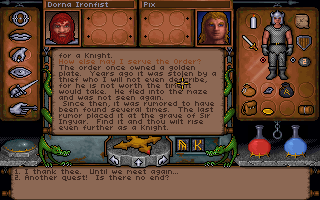
He then gives me the quest for the gold plate which I already have.

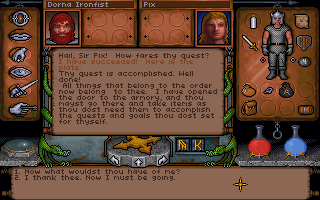
In return for this I get full access to the armory.

The armory has loads of plate armour which is good stuff but very heavy.

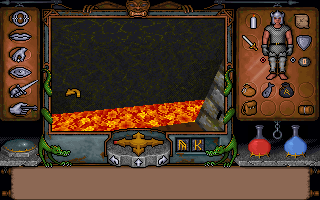
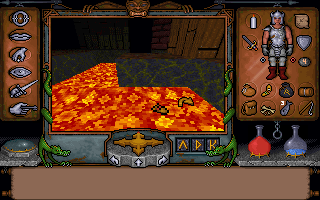
Its time to head to Level 5 now. This has the first lava I’ve seen so far. I don’t have the boots yet so I’m staying away from it.

There are ghouls living on this level. All of whom have useful info or items. The first gives me some info on Ariel. I’m still not low enough in the abyss to find her it seems.

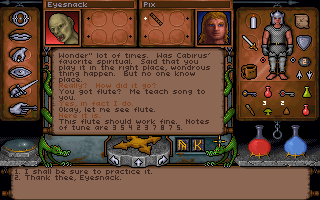
Eyesnack teaches me Mardins Song Of Wonder which I’ve already used to get the Cup Of Wonder.

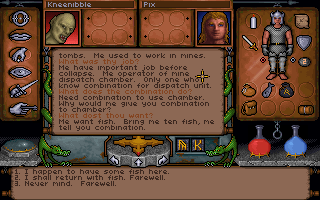
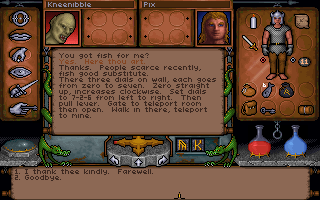
Kneenibble used to operate the mines. He wants 10 fish in return for the combination to the teleport. I drop some heavy armour here so I can go back up a level to fetch them.

On the way out, I find Marrowsuck the tailor. He will make me some boots from the scales and silk in return for more food. It will take half an hour so I go to fetch the fish.

Now I’ve got the fish I get the combination to the mine. I still haven’t got my boots so I decide to sleep to pass the time.


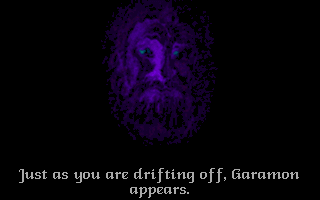
There is a brief cutscene when I sleep featuring Garramon again. He doesn’t have anything useful to tell me.

When I wake my boots are ready so I can now walk on lava with impunity.

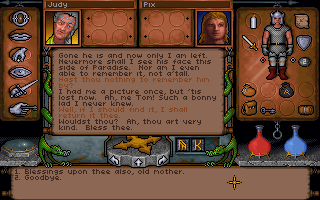
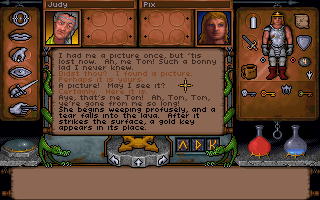
Hanging around by the lava is an old woman called Judy who is apparently pining for Tom who died some time ago but she has lost her only picture of him. Theres nothing I can do for her now though.

I follow the lever flicking instructions to get the ring of humlity.

I also find a mage who offers to make me a giant gold nugget if I will go fetch him 80 pieces of zanium from the mines. This stuff is self collecting so I only have to walk over it.

I head for the mines and use the combination from earlier to open them up.

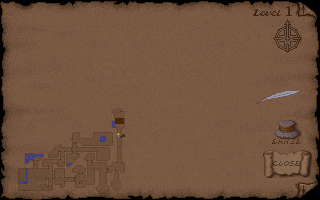
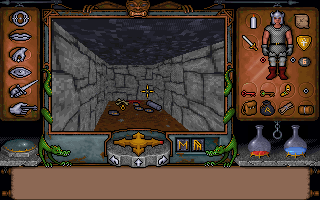
The mines are a clear tribute to PacMan although I don’t think I ever realised it until playing the game this time. You walk round picking up all these dots and there are 4 ghosts in the maze. It even has teleports at each side.

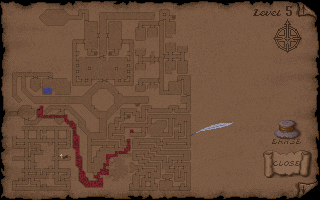
The map at the bottom left certainly looks like the pacman one.

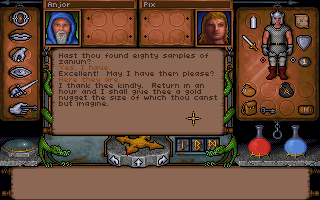
I get my 80 blobs of Zanium but will have to wait an hour to get my gold.

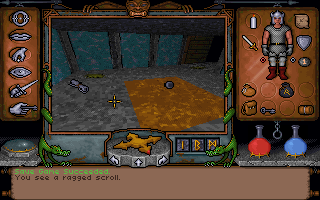
To pass the time I use the gate travel scroll I found outside the mine. This takes me to the moonstone which is in a sealed room on Level 2.

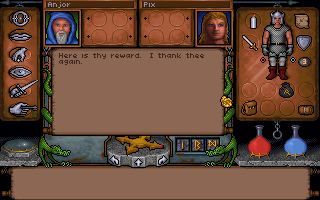
After walking back and waiting a bit my gold is ready.

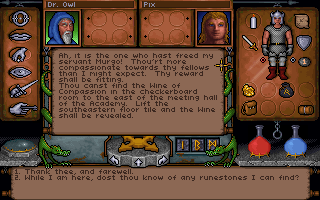
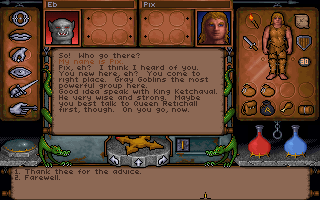
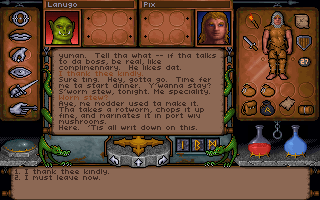
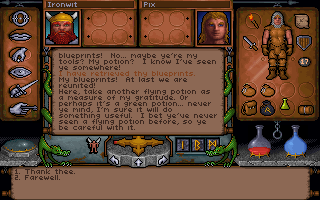
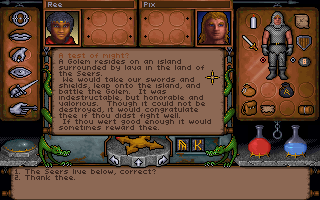
Thats level 5 done so I head for level 6. This is home to the seers of the moonstone. The first one I meet is the boss of Murgo who I freed back on Level 3. In return he tells me how to find the Wine of Compassion.

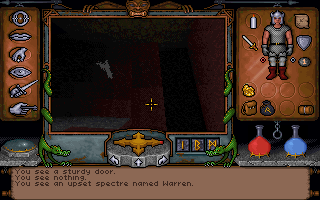
Near here there is “an upset spector named Warren”. Another Warren Spector reference if I ever saw one.

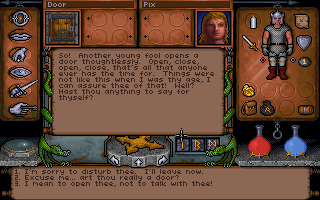
There is also a talking door who gives me the sheet lightning spell.


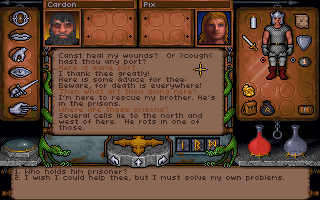
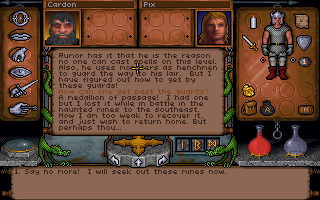
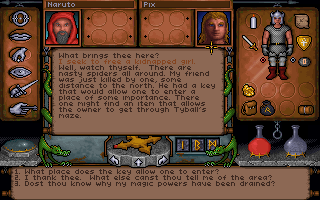
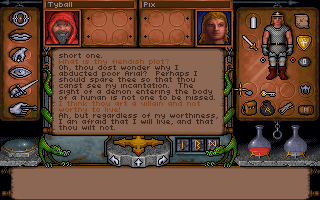
I pop down to level 7 briefly and bump into Cordon. He is basically there for exposition to explain that magic doesn’t work on that level thanks to the evil mage Tyball. There are guard posts on this level which I need a medallion to pass through safely. I’m not worried about this since I’m going to be taking the more violent alternative and hacking/slashing my way through.

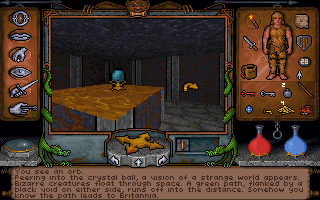
I’m not done with Level 6 yet so I head straight back up. Another mage gives me instructions on how to get a Vas runestone. This is needed for all the most powerful spells.

Another mage gives me some hints about burning incense giving you visions. This is needed for the Cup Of Wonder quest which I’ve already got. Each vision gives 1/3 of a mantra which you can use at a shrine to pinpoint where to play the song.

These are the first two visions – but I’m out of incense for now.

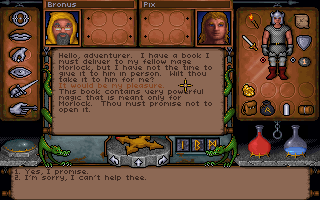
Bronus wants me to carry a book to Morlock just up the corridor but like every other habitant of Britannia is too lazy to do something himself.

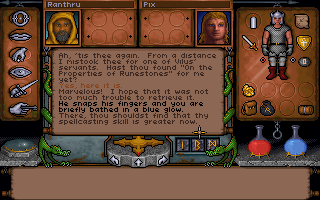
Ranthru wants me to fetch him a book from the NE of the level. This area is full of monsters thanks to an evil mage named Vilus.

I find some more incense for the final vision. The complete mantra is insahn – the order is based on the time of day shown by the sky in the background. 

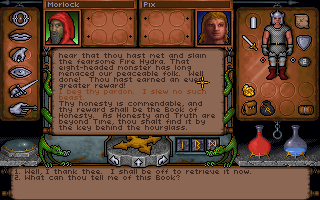
I give Morlock his book and get a clue towards the location of the Book of Honesty. The talismans are coming thick and fast now.

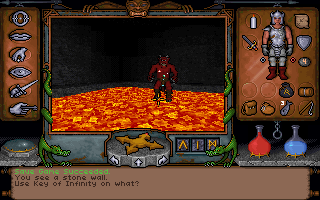
First off I head for the island of the golem to win the shield.

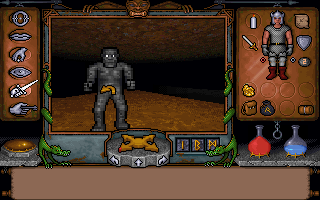
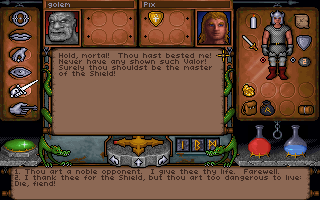
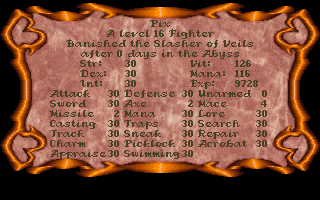
My combat stats are pretty much maxed out by now so this is pretty quick and painless.

The wine is under a floorboard in the NW of the level.

And the book is in a key shaped bit of map behind an hourglass shaped bit as per the clue.

I head off to find this book in the NE of the level now. I run into my first fire elemental. These are pretty nasty at distance as they throw fireballs but as long as I’m close up my defense keeps me from being hurt.

This area of the map is pretty confusing to say the least but I find the book in the end.

On the way back I go to get the Vas runestone. I have to walk between these 2 “eyes”.

Then I’m teleported to an area with some emeralds in the middle and I have to chuck one up to the ledge shown above at each corner.

I then go back to the middle, push the button and the runestone drops from above.

I take the book back to the seer and he increases my casting skill in return.

Thats it for Level 6 so its time to wipe out some guards in Level 7.

I have to fight a load at once but I’m pretty much invulnerable to everything except missiles by this point.

I do find the medallion while I’m walking around but I won’t be needing it.

There are 3 rooms of guards I have to wipe out.

But I reach Level 16 experience through all the fights.

There is a mage hanging around in the NW part of the level. He points me towards an important key guarded by a spider which I go and fetch and also gives me some clues about getting magic back on this level. Tyball has some sort of orb which I need to destroy using the material the orb is made from.

He mentions a prison where I may be able to get help from the inmates. 

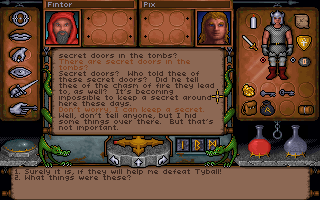
I head for this prison next. By slaughtering the guards I get the key to open most of the cells. The inmates are a sorry bunch. The first gives me some clue about secret doors in the tombs.

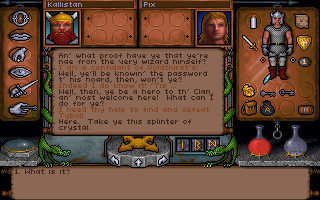
The next gives me a piece of crystal in return for the deco morono password I learnt earlier. This opens up the tombs on this level where some sort of beast has a lair + hoard of goodies. One of the inmates in the prison has an escape tunnel. I use this to get out + the key from the spider and head down to level 8.

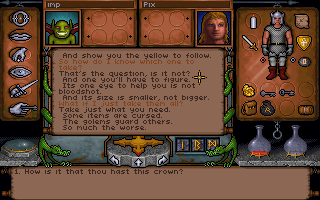
There is an imp here who speaks in rhyme and gives me a clue to find a crown I will need to get through Tyballs maze.

Theres quite a few to chose from but the one I want has a white gem.

I make my way through to the maze – while wearing the crown the gold path shows as above. If I stray off this my health plummets and its more or less instant death.

At the other end is Tyball at last. He gives me a brief rant about summoning a demon then attacks me.

He floats around while attacking me but hes not too hard to beat and this sets off a cutscene.


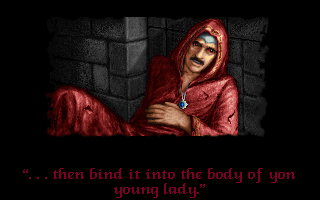
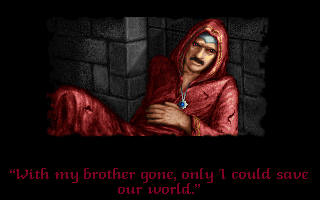
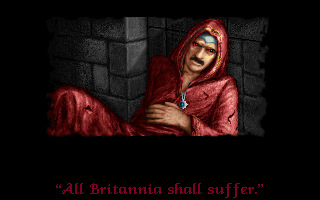
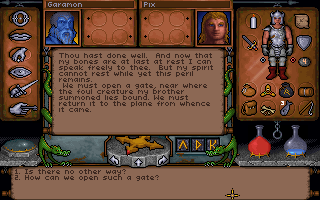
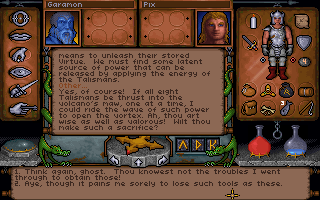
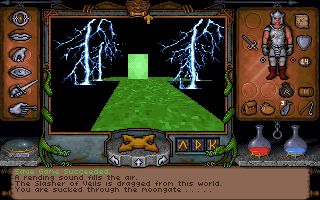
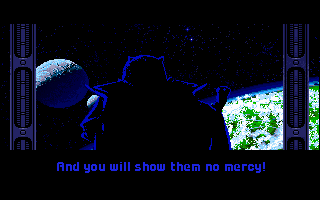
Apparently I’ve just doomed the world as a giant demon he has summoned will soon be getting free from its bonds and will be ustoppable once its free. Guess I’ll have to do something about that but first things first…

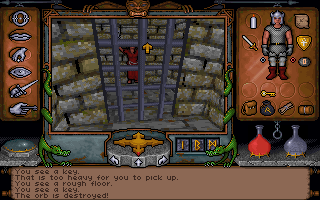
I smash the orb with a piece of orb stone from level 8 and I get my mana back.

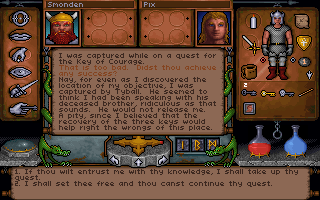
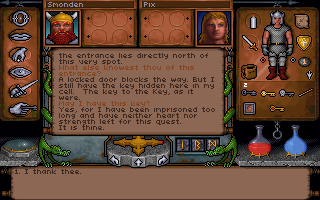
Next I unlock the portculis to free Ariel.


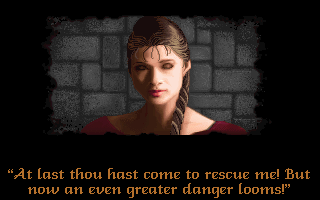
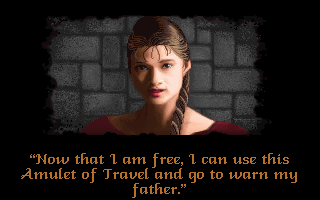
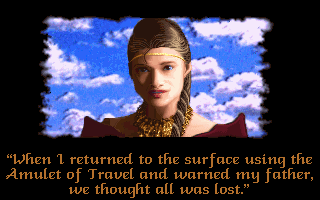
So she had an amulet that would magic her out the whole time… I’m now left behind with no idea of what to do if I hadn’t already played this game half a dozen times. There are a few loose ends first though.

I head for the tombs with my new crystal and a doorway opens up.

After a few secret doors I find the shadowbeasts lair. These are the toughest monsters in the game but like most of the others they can’t hurt me much. There is some nice armour + a pretty good sword in here.

There is also the matter of the 3 locked doors in the prison. Tyball dropped some keys when he dies so I go to try them out here. The first prisoner tries to draw me a map which doesn’t turn out too well but its on a picture of Tom. I’ll take this up to Judy later.

The next talks about a three part key and the bit he was after (the key of courage). He gives me a normal key for a door that will lead me there. I’ll need to collect all 3 parts of this key.

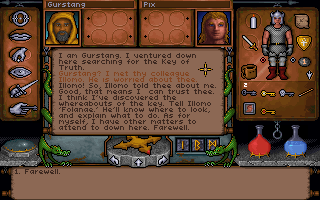
Gurstang in the last cell gives me a clue to say Folanae to one of the seers on Level 6. This would lead me to the library on that level and the word Fanlo in a book. If I say this at a shrine I will get 1/3 of the key.

First, I go for the key of courage as the entrance is just north of the prison. This involves working back up the levels from the bottom in a little section off the side of the main maps.

As you would expect for the Key of Courage the area is full of all sorts of monsters including evil mages.

There is also a wisp.

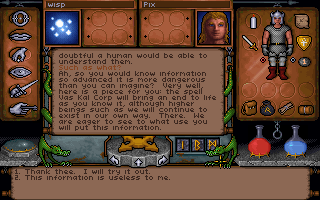
Just like in Ultima 6 the wisp tells me the Armageddon spell. This is just as useless as in Ultima 6 also.


A lot of monsters later I get the Key of Courage.

Since I already know the word I get another part from a shrine with the fanlo mantra. About this time I start to have some problems with my savegames…..

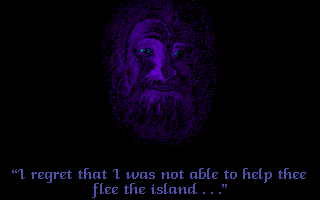
If I slept Garramon would give me a message to return his bones to his grave. His bones are in the west area of Level 8. I go and pick these up but at this point I’ve been having some trouble with my inventory.

On looking in my pack I find half my stuff has gone missing including game critical items due to the infamous inventory bug. I’m about 30 mins from finishing the game here, the timing couldn’t be much worse. To make matters worse, I don’t have any unaffected savegames so I have to start the whole thing again!

This is what I get for downloading this from an abandonware site rather than using my own copy. I’ve never seen this bug before so it was presumably fixed by the time the game was released here in the UK. I’ve now patched the game and started again – in the interests of speed I’ve used a traner to max out my stats. I’m not too worried about cheating as I’m only putting the stats to what they were + I’ve finished this game a load of times before anyway.

I’ve been dashing through since, skipping everything unessential and have actually played through to near enough where I left off in about 90 mins so I’m in a position to finish off tommorow in not much time. Its kind of ruined the replaying though and left my patience for writing this blog entry fairly low hence the even lower than usual quality level.

In some ways this sort of bug is part of the Origin experience around this time. There were similar problems in Ultima 7 with inventory items going missing, and a show stopping staff strike bug in UW2. They obviously got fixed but it wouldn’t make it any less annoying to have to restart especially in games that big. From now on I make sure I’ve got the latest version before I start one of these games though instead of just assuming.

Ultima Underworld

I set straight into Ultima Underworld after finishing Special Operations. This is possibly my favorite game of all time and because of this I know it inside out before I start playing. It was also the first Ultima I bought new when it came out although my PC really wasn’t up to running it properly. This will be something of a speedrun and I’ll just play through it in the shortest possible route without missing anything out as I already know all the quests, items, etc.

This game was the first real-time FPS-style 3D game on the PC as far as I know. It came out a month before Wolfenstein 3D but the engine used was massively more sophiscated. It was the first came from Looking Glass Studios although they were known as Blue Sky Productions at this point in time.

The intro starts with me struggling to sleep and being visited by a ghost. The intro has the usual bad voice acting but was impressive at the time.

The ghost summons me to Britannia just in time to see his brother vanish.

and witness a troll carrying away a woman.

At this point the guards burst in and blame me for the kidnap.

The head of the guards has the most stupid accent yet. I think its supposed to sound like a Cockney. He drags me off to meet Baron Olmric.

The barons accent is siller still. You have to be an American to think anyone in Britain sounds like this.

I tell him I’m the Avatar but he is not all that convinced. The kidnapped girl was his daughter and she has been carried into the Stygian Abyss. Since none of them are brave/stupid enough to go in after her he sends me instead.

The head of the guards takes me to the abyss and opens the door.

He says he will stand guard until he hears Ariels voice.

And then I’m locked in.

There is quite a lengthy character creation process. I can chose certain skills, character type etc. There is none of the questions associated with other Ultimas – I just pick what I want.

And then I’m into the game itself. The first impression is that I can’t see much but the bag on the right contains some essentials such as a torch and my map. The view window isn’t huge although not that much smaller than what we saw in earlier 2D Ultimas. The interface is very nicely designed so that everything can be done with the mouse. Movement speed and direction is based on how far the pointer is from the center of the window. Its a bit odd if you are used to the usual wasd keys but since I played this way before the FPS genre was invented this is second nature anyway.

The inventory and armor, weapons and the like are all visual and on screen at the right. If I wear anything its shown on the character. Its fairly similar to what we saw from Ultima 6 on with the doll added in and works very well. I can see my stats if I want by clicking on the chain. My health and mana is shown in the two glass jars.

The manual for the game describes the efforts to create a community in the abyss of all intelligent life across Britannia by Sir Cabirus so its a very different place to the last time I saw it in Ultima 5. Unfortunately the experiment failed when Cabirus died and the inhabitants started to turn on each other, resulting eventually in the abyss being sealed for good and used as a prison.

With a torch lit I can see a bit more. The graphics really aren’t bad at all – obviously they are basic by modern standards but compare this to Wolfenstein and its just not in the same league. For instance here we have ground and roof textures and the ground slopes away from the door smoothly. This needed a monster machine to run well however at the time. None of us even had local bus graphics cards when this came out.

The environment is quite interactive. Here I pull a chain on the wall, I see it move and the door swings open.

Down the hall I find a rune bag which I will be using for spells later in the game. The spell system here requires just the use of runes in the correct order + mana. There are no reagents. Spells are divided into levels which you can’t cast until you are twice that level if I remember correctly. There are 16 levels in this game as opposed to the usual 8.

I spot my first critter – a giant rat who is actually not agressive so I leave it alone.

Behind another door is the first person I get to talk to, Bragit.

Talking to someone brings up a conversation screen in the main view window + options right at the bottom. The system is the sort of thing used by Lucasarts and works very well. There is also a trade system using the circles by the character portraits to drag/pick items for possible trades.

Bragit gives me some general advice about the abyss. There are plenty of non-hostile areas where the civilised people live although it is still dangerous elsewhere.

My first fight is just down the hall. Its a rotworm and dies in a couple of hits. Combat is real time and fairly basic. You just hold down the mouse button and the gem on the left gradually turns green depicting blow power. You then release and attempt to strike. There are 3 areas of the screen you can click on for 3 types of blow but in general you just want to click on the monster. Notice here that I’m looking down slightly. It gets a bit distorted but you can look up and down in this game – you couldn’t even do that in Doom.

Pulling the chord on the wall opens a door and a bat flies through it and attacks me. If I’m honest they could have used a few more pixels for this thing but it looks vaguely batlike at least. It poisons me but this wears off by the time I lose half my hit points or so.

Behind the door is a river which I swim through for a bit. The view even tilts around when you swim.

I find the human settlement after jumping over a gap. No one here has anything massively useful to tell me although I’m told that Ariel has been taken lower in the abyss by the troll.

I run into my first goblin who is less than friendly. He takes a bit more killing than anything else so far.

Behind a secret door is the silver sapling. This is in essence a respawn device. If I take the sapling it withers and I get a seed instead. I can then use this to plant the sapling again and if I die I respawn at that point.

Something I haven’t mentioned is that the game comes complete with an automap. I can’t think of any of its contempories having this facility and it helps gameplay no end. I can even write notes on here if I want.

The stairway to the next level is blocked off so I will have to find another route. I’ve still not seen half this level yet anyway.

Behind another secret door is a life restoring fountain. Knowing where most of these are is going to make my life a lot easier.

There is a big settlement of goblins nearby. By being polite I talk the guard into letting me in. No one has any massively useful information again. This first level is really more introductory and scene setting if anything although there are a few important things to do.

One of which is this crystal ball. When I look in it I get to see myself running along a green path to Britannia. This bit of knowledge will come in useful at the very end of the game.

One of the puzzles on the level involves manipulating four switches which adjust the height of 4 pillars. If I get it right I can jump up a sequence of 8 pillars to get to some minor treasure. This sort of 3D environmental puzzle is again impressive and there will be a few of them throughout the game.

At the top is a grave + a sceptre which I take.

The water in Ultima Underworld contains its own monsters called Lurkers. You can’t attack unless you are on land (or using magic) but by walking to the edge and looking down I can kill them off.

There is a second settlement of goblins (green ones this time). They don’t like each other much but by being polite I can get in again to see them. Lanugo gives me permission to speak to King Vernix and also gives me a rotworm stew recipe. This will be coming in handy later.

King Vernix gives me a lot of background information and the various settlements in the abyss but nothing essential.

The grey goblins mentioned a spider called Narvey Nighteyes. I set out to kill it and run into its smaller cousin first.

After killing the spiders off I find a small hoard of spider thread. Again I know I’ll need this much later so I grab some.

That pretty much finishes off this level so its down to the Level 2.

My screenshots gone missing but I run into a shrine on Level 2. This is a full 3D ankh which I can use mantras on to raise stats. You learn mantras throughout the game but I remember the useful ones anyway. I use amo to raise my sword skill.

Next I get my first quest of the game. A confused dwarf called Ironwit wants his blueprints back and gives me some lengthy instructions on how to get them.

The next room consists of a small maze like path with big drops off the side. I attempt a jump to get to another room and miss it and fall directly onto a headless.

After some backtracking I make the jump and get into the next section. I’m attacked by a load of worms at once but get the key I need from the far end of the room.

The key lets me open a door to get a flying potion. This allows me full 3D movement around the map and I fly to an otherwise unreachable room to fetch the blueprints.

Ironwit gives me another flying potion for my trouble.

There is a great big settlement of dwarves here. I pick up a quest to kill a monster haunting their mines and also get told about the 8 talismans of virtue which Cabirus collected and are being misused. I will be needed them later and collecting them as I go.

This portuclis is locked but I can see the switch to open it on the other side. Using a pole I’m carrying I flip the switch and let myself in. This is a trick mentioned in one of the conversations on the first level.

I get a vision of a moonstone by looking in an orb here. I won’t be able to get this for ages though. I also find another healing fountain nearby. Now I’m in good health I set off to kill this monster in the mines.

Its behind a load of rocks. Using a rock hammer I smash them to bits.

The monster turns out to be a gazer. It goes down in about 3 hits.

Goldthirst rewards me with a not so useful gem cutter but I know someone down a few levels who would like it.

By giving him a gift in return I get the password to look at his treasure room. I will need this also much much later.

The treasure room is less than exciting. I suppose if I could cast telekinesis I could go in and steal his treasure. Or I could use the flying potion. I know from experience that a golum is walking around down there somewhere though and I don’t need the money so I leave well alone.

I head to level 3. I shouldn’t know about this yet but my moving some vines on this level I can clear some water and go fetch half of the Caliburn sword (one of the talismans).

The blade is sitting waiting to be picked up. The sword is seriously useful to have since it never wears out. I decide therefore to go and fetch the other half at this point.

Down on level 5 in a large series of tombs full of undead I find the other half of the sword. I’m sort of cheating a bit since I know where all this stuff is already but I can hardly forget where it is.

On the way back I run into Rodrick the chaos knight. In theory I don’t know this yet but he is a sort of rebel from the Knights on this level and the best swordsman of them all. I would have got a quest to defeat him at some point to help out an injured knight. I’m jumping the gun a bit here but he attacks me so I kill him off.

Back on Level 2 again, I head for Shak the weaponsmith. He fixes the sword in return for 20 gold pieces. I have to wait an hour for him to finish.

I’ve got my first and most useful talisman.

That pretty much finishes up Level 2 so I head for Level 3 again. This is a swampy level with the sentient race in this case being Lizardmen. First off I run into Zak who is obsessed with anything that gives off light. Later in the game I should find out that he stole one of the talismans – the taper of sacrifice. I offer to trade with him and swap him the taper for a few candles. Again I shouldn’t know that this is the taper but I do so I may as well get it while I’m here. Its a seriously useful item as it gives off light continually without ever running out.

I must have explored about half of Level 3 at this point but there is still plenty to do. This game is every bit as good as I remember it but I really know it far too well to be able to play it properly even though its years since the last time. I’m less familiar with its sequel so that will be a bit less predicatable at least when I get that far.

I love the attention to detail in this game above anything else. The technological achievement of the 3D engine is amazing enough on its own but all the extra effort put in here with the dialog, puzzles, plot and general interaction with the world just took it to another level and I can’t think of any other game I ever played that pushed the technology this much but also took gameplay to another level while doing it. Nothing came out to rival this or its sequel for many years and this game is still quite playable as far as I’m concerned. Its the best music score in any of the Ultima’s to date also – its quite downbeat and atmospheric rather than musical but this works much better as background music because of it.  The intro music is one of my favorites on the MT-32.

Day 74

The next mission turned out to be a lot easier than the ones before it. I had to babysit a load of trainee pilots. On the downside this means flying with 4 wingmen none of whom mind shooting me if I’m anywhere near the target but are totally unable to hit what they are aiming at.

The amount of friendly fire is pretty silly so I back off when it gets to the last fighter.

Next mission is to retrieve a Kilrathi data pod with their battle plans so we can change them are get their fleet to strike where we want them. This is another easy mission and I make it through first time.

Next up we go for the fleet itself. The fleet is smaller than expected and go down pretty easy.

It turns out they didn’t entirely fall for the data pod and the fleet is moving in elsewhere.

Paladin says his goodbyes and heads off to track the fleet movement..

but as soon as I take off hes in trouble again so I have to go rescue him.

Some of the Kilrathi seem to be shooting each other for some unknown reason.

As soon as I autopilot in there is an ejected Kilrathi who I tractor in.

I dock with the Bonnie Heather after taking out all the enemies.

And find out I’ve just tractored in Prince Thrakath.

Khasra was attempting to assisinate him and get a step nearer to being emporer.

Khasra comes back and tries to talk us into giving him up. Instead I get sent out in a bomber to fend them off.

As soon as I launch the prince escapes and steals a crossbow.

Somehow he’s already too far away to catch, and heads off to take on the squadron himself. He allegedly doesn’t have a chance on his own even though thats the mission I’ve just been sent out to do myself (on my own).

I set off in pursuit but he jumps out just after I arrive leaving me with about 7 ships to take on at the same time.

This is a pretty tough mission but not too bad as the crossbow makes pretty short work of the medium fighters. The trick is to leave Khasra till last as he takes way more hits to kill.

This just leaves the final mission and I must have spent about 90 minutes trying to complete this one. I have to go out and kill the strike fleet in a Sabre with Hobbes on the wing. I’m met on the way by Bear + wingman also in Sabres. This is a bad sign from the start. The more wingmen, the harder the mission as the wingmen are always useless in this game.

Sure enough they fly into each other, shoot me everytime I get on the tail of a Kilrathi, run into their own missiles or the two Fralthis and are generally not much help. To make matters worse the two Fralthi have some sort of supergun that they are deadly aim with. Whenever I take out the fighters, this keeps getting me killed when I try the torpedo run. If I veer off to avoid it I lose torpedo lock and have to start again.

 Eventually one of my wingmen scores a torpedo hit before getting blown up. I also find out that I can using afterburners avoid the big gun and not quite veer off enough to lose lock most of the time. If I lose lock I play conservitavely and retreat to start again. Also the gun occasionally shoots off in completely the wrong direction so you could if you are patient just wait until it misses before following through with the run.

This was undoubtedly the hardest mission in any Wing Commander to date although having completed it now I reckon I could go back and do it with less trouble now I have the technique to avoid the gun and keep lock so in that sense its pretty well designed. Once completed this mission kicks straight into the end cutscene which I’ve got every screen from below.


So Ghorar Khar was worthless after all. Thats a fairly downbeat ending to set up the next mission pack. I’ve still enjoyed this though – its been the best Wing Commander experience so far. The plot moved around a lot and there was quite a bit of variety to the missions.

Next: Ultima Underworld

Day 73

The difficulty level of this game went through the roof today – I spent going on 2 hours doing another 6 or 7 missions. The one I was on yesterday didn’t prove too hard although I’m really not too keen on Epee’s.

When I get back Angel fills me in on the traitors. They were ordered to kill unarmed Kilrathi transports and rebelled.

They also have a new experimental fighter called a Crossbow. In the next mission I have to go out and meet up with one of the traitors and escort them back to the Concordia.

Its another mission flying Epees against human pilots (in either Epees or Ferrets). This missions are really quite tough – a single hit from an Epee will wipe out my shield, armor and usually break some part of my ship. To add insult to injury my copilots I have to escort back are useless. On one of these missions, I get down to the last ship and then get to see them both crash into each other and kill themselves. I get them back in the end though.

Tolwyn interrogates Bear in the brig. He will pardon the crew of the Gettysburg but there some of the crew have formed a faction against Confed and taken over a space station.

I get the mission to fly on my own to the Gettysburg and try to talk them into rejoining.

I have to kill a lot of humans on the way but this missions pretty easy as I’m in a Sabre this time and I meet up with the Gettysburg.


Talking them round is easy but they have picked up a Confed supply ship on its way to refuel at the station. If it gets there it will be destroyed.

I volunteer to lead the attack on the station and get to fly the new Crossbow for the first time.


The crossbow is a modified Broadsword bomber. It has a couple of extra neutron guns making its firepower truly lethal, although full guns drains the power in no time. It turns a lot faster than the broadsword but still has no afterburner. Against slow targets its a really nice ship but its not that easy taking out Epees in it. My copilots once again seem to delight in crashing into each other on this mission but its not too hard and I manage it without them.

With the Gettysburg back with us again its finally time to actually do what the games title says and go on a special operation.


The Kiltrathi are rebelling on several other planets as well and trying desperately to retake Ghorar Khar to quell the other uprisings by example. Our job is to make sure that doesnt happen. The mission involves Paladin, Hobbes as my gunner + a new character Major Edmunds in communications. First mission we just fly out to Olympus. It looks like I’m flying solo on these missions which is fine by me.

Next mission, I’m escorting a gun runner to meet up with a rebel Kilrathi cruiser.

I then have to escort both ships to a jump point guarded by a couple of small cap ships. Both of these ships fire missiles at me which I have no way of avoiding with no afterburners and no chaffs in the Broadsword. It took a few goes but the only way to get through this is to try to even out the hits between front and back shields. I also get attacked by 6 smaller ships at the same time at the next nav point. This is easier than I’d have expected and I make it through the first time I get that far.

Back at Olympus after the mission, I have a chat with Major Edmund who seems to have a problem with me.

Apparently she caused the destruction of the TCS Kirsk by incorrectly unencoding some transmissions and had 6 months of reconstructive surgery to recover from the attack. I remind her of this because of the stealth fighter business at the start of WC2 so shes taking it out on me. At least she didn’t get 10 years in the security services though.

That puts me about two thirds through the game. These have been some of the hardest missions in any Wing Commander so far but not unfairly so. Once I get the hang of fighting Ferrets/Epees or learn the missions better, I’m getting through each one without too many replays. The storyline and variety of mission is improved on WC2. This really is a close equivalent to SM1 in this respect and is an improvement to WC2. It also uses the same ploy of human opponents so I get to fight a whole new range of fighters without anything new having to be done.

Regarding the slowdowns going into/out of autopilot, I’m still getting the same thing. Whatever the problem is, it gets worse the longer I play for and just gets slower and slower. Restarting the game without exiting Dosbox cures it. A simple solution for me is to exit and start again after I complete each mission which is a little annoying as I have to wait for the MT-32 sounds to upload each time but not too big a deal.